
Introduction
Bag charms are one of those little fashion extras that instantly upgrade your style. They hang from your handbag, backpack, or even your keys, and they always grab attention. The best part? You don’t need to spend big money to get one because you can make your own. In fact, learning how to make bag charms at home is fun, affordable, and surprisingly easy.
DIY bag charms let you add a personal touch. You can create charms that match your outfit, highlight your personality, or even give them away as thoughtful gifts. Think beads, tassels, fabric cutouts, resin figures, or even clay designs. There’s no single rule, and that’s what makes them exciting.
In this guide, I’ll walk you through everything you need to know. We’ll cover materials, tools, tutorials, and creative design ideas. Whether you’re a beginner or someone who loves crafts, by the end you’ll know exactly how to make a bag charm that feels unique to you.
What Are Bag Charms?
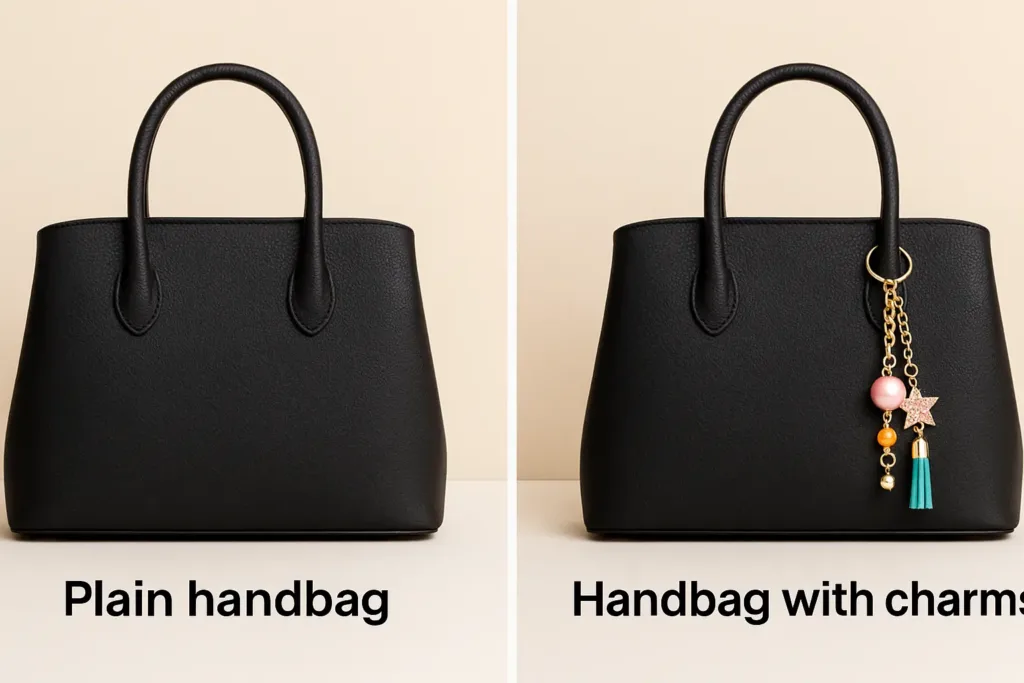
Bag charms are small decorative accessories that attach to your bag with a clasp, chain, or keyring. They can be made of beads, fabric, tassels, resin, clay, or even recycled jewelry pieces. Some people also call them “bag danglers” or simply “keychain charms.” While they look similar to keychains, they’re meant more for decoration than holding keys.
The charm usually dangles from the bag handle or zipper, adding personality and flair. You’ll see everything from designer bag charms costing hundreds of dollars to simple handmade versions sold at local craft fairs.
Here’s the real difference between bag charms and keychains:
- A keychain is practical. It’s mainly used to hold keys together.
- A bag charm is decorative. Its main job is to make your bag look stylish.
That’s why DIY bag charms are such a hit. They’re not just accessories. They’re little expressions of your creativity. And since trends in fashion come and go, making your own charms gives you freedom to keep up without breaking the bank.
Materials You’ll Need to Make Bag Charms
Before you jump into tutorials, let’s talk about supplies. The great thing about bag charms is you don’t need professional-grade tools or expensive materials. Most of the items can be picked up from craft stores like Michaels or online marketplaces like Amazon.
Here’s a breakdown of what you’ll need:
Essential Hardware
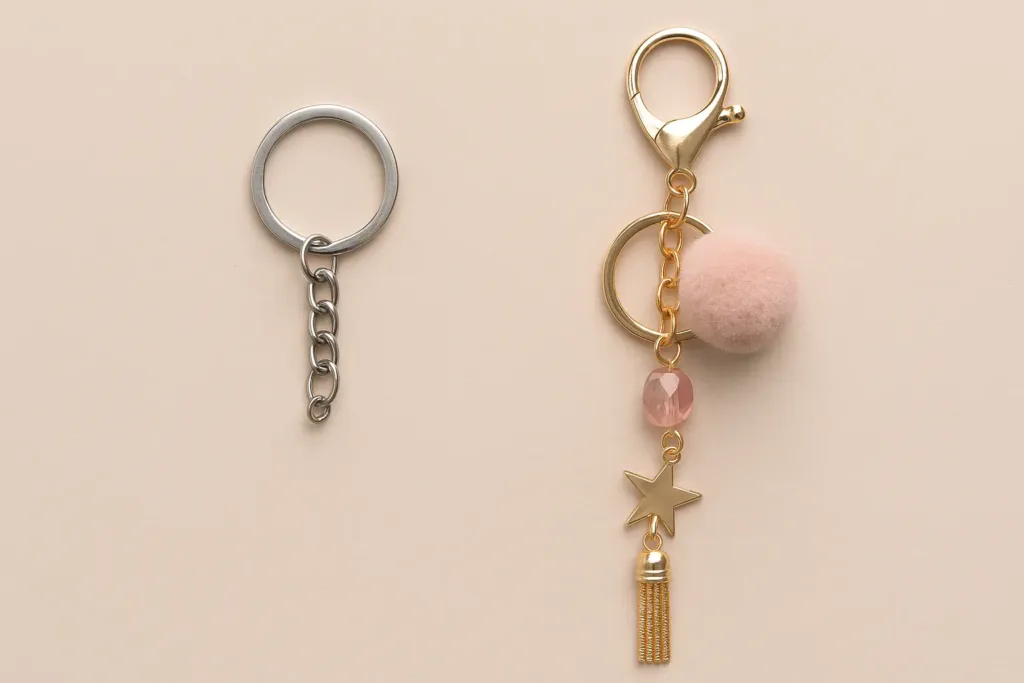
- Keyrings and clasps: These are what connect the charm to your bag. Look for lobster clasps, D-rings, or standard split rings.
- Chains or cords: These form the base where you attach beads or pendants. A short piece of jewelry chain or waxed cord works well.
- Jump rings: Small metal circles used to attach beads, charms, or pendants to chains.
Decorative Elements
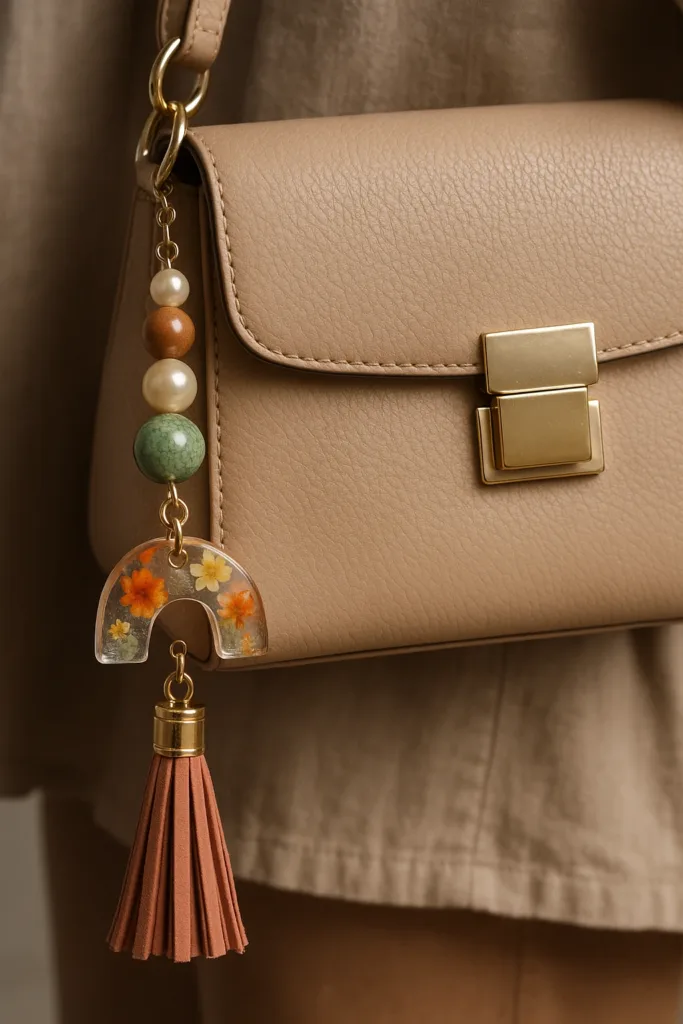
- Beads: Glass, acrylic, resin, wooden, or gemstone beads all work. Mixing sizes and textures creates more visual interest.
- Charms or pendants: Small metal or enamel designs—think stars, moons, initials, or animals.
- Fabric or felt: Useful for cut-out designs or sewn shapes.
- Polymer clay or resin: Perfect for making custom designs or molded figures.
- Tassel materials: Embroidery floss, yarn, leather strips, or suede.
Tools You’ll Want
- Flat-nose pliers: Essential for opening and closing jump rings.
- Round-nose pliers: Handy for making loops with wire.
- Scissors: For cutting fabric, thread, or yarn.
- Glue: E6000 or fabric glue for extra hold.
- Needle and thread: For stitching felt or fabric charms.
Tips for beginners:
- Start small. Grab a pack of beads, a clasp, and some pliers. You don’t need every supply on day one.
- Reuse what you have. Old necklaces, earrings, or keychains can be taken apart and recycled into charms.
- Choose lightweight materials at first. Heavy beads or pendants can make your bag handle sag.
Step-by-Step Guide: How to Make Bag Charms

Bag charms might look fancy, but once you break them down, the process is straightforward. Below are four detailed tutorials: beaded charms, fabric charms, resin or clay charms, and tassel charms. Each method has its own vibe, so you can experiment and find which suits your style best.
How to Make Beaded Bag Charms
Beaded charms are the go-to option for beginners. They’re versatile, colorful, and can range from sleek minimalist styles to chunky statement designs. I recommend starting with beads because they teach you the basics of working with clasps, jump rings, and chains.
Step 1: Choose your beads.
Pick a mix of shapes, sizes, and textures. Glass beads look polished, wooden beads give a natural vibe, and resin beads allow for fun patterns. Lay them out in the order you want before stringing them.
Step 2: Thread onto headpins.
Slide beads onto jewelry headpins or eyepins. Leave a small space at the end for looping.
Step 3: Create loops.
Use round-nose pliers to bend the wire into a small loop. This keeps the beads secure. If you’re new, don’t worry if your loops aren’t perfect—they get easier with practice.
Step 4: Attach to chain.
Open a jump ring, slide your beaded loop in, then close it tightly with pliers. Attach several bead strands to a short piece of chain.
Step 5: Add clasp.
Finish by connecting the chain to a lobster clasp or keyring. Test it by tugging gently to make sure everything holds.
Pro tips for beaded charms:
- Stick to 2–3 colors to avoid clashing.
- Use a mix of small and medium beads to create depth.
- Add a single pendant at the bottom for a focal point.
Beaded bag charms are fast to make—most take under 30 minutes. Once you’ve made one, you’ll want to experiment with more patterns, from boho bead mixes to pearl-and-gold elegance.
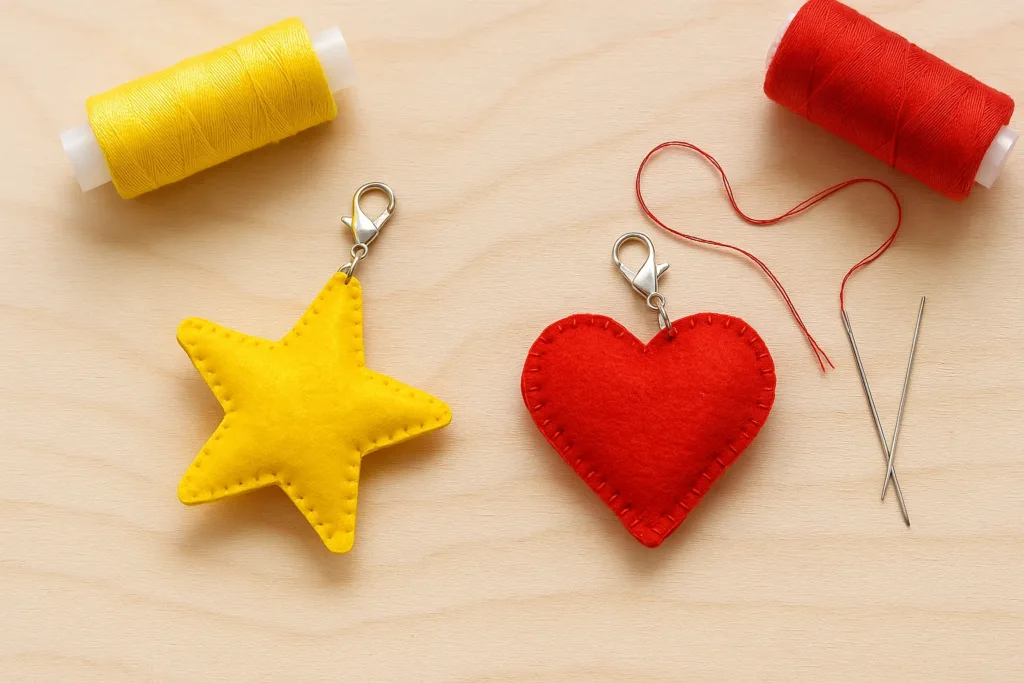
How to Make Fabric Bag Charms
Fabric bag charms are lightweight, playful, and perfect for personal designs. They’re also a great way to reuse fabric scraps or felt sheets you already have at home.
Step 1: Cut your shape.
Decide on a design—hearts, stars, flowers, or even letters. Use fabric scissors to cut two identical pieces. Felt works best because it doesn’t fray.
Step 2: Stitch or glue.
Place the two fabric pieces together and sew around the edges, leaving a small opening. If you’re not into sewing, fabric glue also works.
Step 3: Stuff lightly.
Add a bit of cotton, fabric scraps, or stuffing before sealing the last edge. This gives the charm a 3D, plush look.
Step 4: Embellish.
Sew on sequins, small beads, or embroidery details. For kids’ bags, try adding cute googly eyes or patches.
Step 5: Attach clasp.
Sew or glue a loop of ribbon at the top, then attach your jump ring and clasp.
Pro tips for fabric charms:
- Choose bright, contrasting fabrics for bold designs.
- Layer different fabric shapes for a unique 3D effect.
- Add iron-on patches or initials to personalize.
Fabric charms are beginner-friendly because they don’t require special jewelry tools. Plus, they’re soft and durable, which makes them perfect for school backpacks or tote bags.
How to Make Resin or Clay Bag Charms
Resin and clay charms take more effort but deliver incredible results. If you want personalized initials, cute characters, or trendy aesthetic charms, this method is for you.
Step 1: Prepare materials.
For resin, get a silicone mold, resin mix, and pigments. For clay, grab polymer clay and basic sculpting tools.
Step 2: Create your design.
- Resin: Mix resin and hardener, then add glitter, dried flowers, or pigment. Pour into molds (like stars, hearts, or letters).
- Clay: Shape into mini figures, initials, or abstract designs. Bake polymer clay per instructions.
Step 3: Add hardware hole.
Before curing or baking, insert a small eye pin into the resin or clay. This ensures you can attach it later.
Step 4: Cure or bake.
Let resin cure for 24–48 hours, or bake clay according to the package. Don’t rush this step—impatience often ruins the design.
Step 5: Finish and attach.
Sand rough edges, then attach to a jump ring and clasp.
Pro tips for resin/clay charms:
- Wear gloves when working with resin for safety.
- Mix glitter and pigment for custom looks.
- Try marbling clay colors for a trendy aesthetic.
These charms feel store-bought when done right. They’re ideal for gifting because you can customize them to fit someone’s personality.
How to Make Tassel Bag Charms
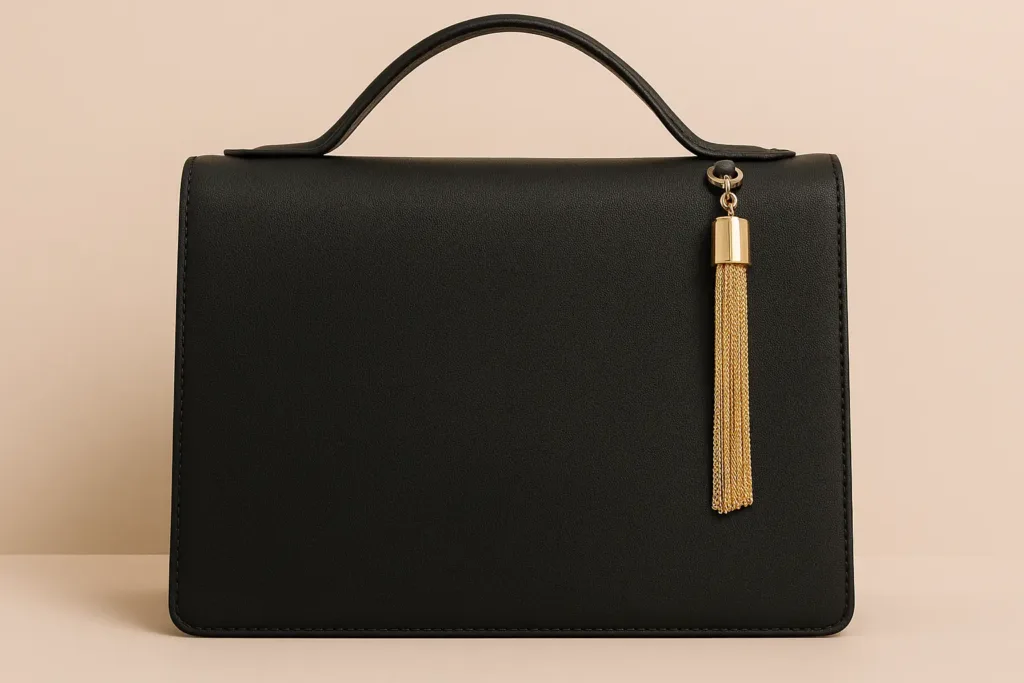
Tassels are timeless. They add movement and elegance to any bag, and you can make them with almost any material—thread, yarn, suede, or leather strips.
Step 1: Wrap thread.
Take cardboard or a book and wrap thread or yarn around it 20–40 times, depending on how thick you want the tassel.
Step 2: Tie the top.
Slide the bundle off carefully, then tie one end tightly with a separate piece of thread. This creates the “head” of the tassel.
Step 3: Cut the bottom.
Snip the looped end to create fringe. Trim so all strands are even.
Step 4: Wrap and secure.
Wrap thread around the top part of the tassel several times and tie it off. For a neater look, glue the ends in place.
Step 5: Add clasp.
Insert a jump ring through the top and attach your clasp.
Pro tips for tassel charms:
- Use embroidery floss for sleek tassels.
- Add a bead cap at the top for a polished finish.
- Combine multiple tassels for a layered charm.
Tassel charms look great on handbags and totes. They’re quick to make, elegant, and versatile—you can go minimalist or colorful.
Creative Ideas for Personalized Bag Charms
One of the best things about DIY bag charms is personalization. Unlike store-bought versions, you can make them unique to your taste. A charm doesn’t just decorate your bag—it tells a story. Maybe it shows off your favorite colors, your initials, or even your hobbies.
Here are some creative ways to customize your charms:
1. Initials or Names
Personalized initials never go out of style. You can make them with felt, resin, or clay. A resin letter filled with glitter makes a trendy charm, while felt initials look cute and soft. You can even sew two letters together to create a layered effect.
2. Photo Charms
Tiny photo frames or resin with embedded pictures can turn a charm into something sentimental. Imagine carrying a small photo of your pet, your family, or a favorite memory on your bag.
3. Themed Bag Charms
Seasonal themes work great. A pumpkin charm in October, a snowflake in December, or seashells in summer adds a playful touch. Travel lovers often use charms shaped like airplanes or landmarks.
4. Upcycled Jewelry Charms
Broken jewelry doesn’t have to go to waste. Old earrings, pendants, or chains can be repurposed into charms. This gives your bag charm a polished look without spending extra money.
5. Matching Outfit Charms
If you love coordinated fashion, create charms to match your outfits. For example, pair a red tassel charm with a red scarf, or make pastel beaded charms to go with spring dresses.
6. Mini Plush Charms
Stuffed felt animals or shapes add a fun vibe. Kids love these, but adults can enjoy them too, especially for casual tote bags.
Tips for creative personalization:
- Use charms to show your personality—bold, minimal, playful, or elegant.
- Mix materials. A resin letter with a tassel looks balanced and stylish.
- Don’t be afraid of color. Charms are meant to stand out.
If you’re ever stuck for ideas, browsing handmade items on Etsy or checking Pinterest boards will give you endless inspiration.
Tips for Designing Stylish Bag Charms
Making a charm is one thing—making it stylish is another. If you want your DIY charm to look like it came from a boutique rather than a craft table, design plays a big role.
Here are some tips I’ve learned over time:
1. Balance Size and Weight
Your bag charm shouldn’t overpower your bag. Small bags need smaller charms, while larger totes or backpacks can handle chunkier designs. A heavy charm may also pull on your bag handle, so test the weight before daily use.
2. Stick to a Color Palette
Pick 2–3 main colors and repeat them across beads, tassels, or fabrics. A limited palette looks cohesive, while too many colors can feel messy. For a neutral look, stick with black, white, and metallic tones.
3. Mix Textures
Stylish charms often combine different textures—metal chains with soft tassels, smooth beads with felt cutouts, or resin paired with yarn. The contrast makes the charm look more interesting.
4. Add a Focal Point
Every stylish bag charm has a star of the show. It could be a resin pendant, a large bead, or a bold tassel. Surround it with smaller elements to draw the eye.
5. Keep It Durable
A stylish charm won’t matter if it falls apart after a week. Always close jump rings tightly, double-knot threads, and use quality clasps.
6. Think About Placement
Charms look best when clipped near the handle or zipper. Avoid attaching them in spots where they’ll rub too much against fabric.
Pro tip: Look at fashion magazines like Vogue for inspiration. Even if they’re showing luxury bag charms, you can re-create the look with DIY methods.
Common Questions About DIY Bag Charms
Are bag charms the same as keychains?
Not really. While they may look similar, their purposes are different. A keychain is built for holding keys securely. It’s designed to be strong and functional. A bag charm, on the other hand, is meant for decoration. It’s usually more detailed, colorful, or delicate. Some charms double as keychains, but if your goal is fashion, focus on charms.
What’s the easiest way to make a bag charm?
Beaded charms are the easiest. You only need beads, headpins, pliers, and a clasp. They take less than 30 minutes to make and give instant results. Fabric charms are also beginner-friendly since they don’t require jewelry tools. Resin and clay take more time and patience, so save those for when you’re ready to level up.
Can I make bag charms without special tools?
Yes, absolutely. If you don’t own pliers or jewelry tools, you can still make tassel charms with just scissors and thread. Fabric charms can be made with felt, glue, and scissors. Even a simple ribbon tied with a bow can work as a bag charm. Tools just make things easier and give a polished look.
What materials work best for beginners?
Felt, beads, and tassel materials are the most forgiving. Felt doesn’t fray, beads are easy to assemble, and tassels require only thread and scissors. Resin is trickier since it involves mixing chemicals, and clay needs baking. Beginners should start simple, then branch out as they get comfortable.
How do I attach a bag charm securely?
The key is in the clasp. Lobster clasps are the most reliable because they lock tightly. Make sure your jump rings are closed all the way—no tiny gaps. If you’re sewing fabric charms, reinforce the thread loop at the top so it doesn’t tear. A quick test is to tug the charm lightly before using it. If it holds, you’re good.
Where to Buy Bag Charm Supplies
The right supplies make DIY bag charms easier and more fun. Luckily, they’re not hard to find, and you can shop both online and offline depending on what’s convenient for you.
1. Local Craft Stores
Shops like Michaels, Hobby Lobby, or Joann Fabrics carry everything you need. You’ll find beads, clasps, fabric, and tassel threads all in one place. The benefit of shopping in-store is that you can touch and compare items before buying.
2. Online Marketplaces
Websites like Amazon have endless choices. You can order bead assortments, resin kits, and hardware in bulk. Etsy is also excellent for unique supplies. Many sellers offer handmade beads, charms, and molds that you won’t find in mainstream stores.
3. Specialty Shops
If you’re serious about crafting, bead stores or jewelry supply shops offer higher-quality materials. Resin specialty stores also sell unique pigments, molds, and safe curing equipment.
4. Upcycling Options
Don’t overlook what you already have. Old jewelry, broken necklaces, or leftover fabric scraps can be recycled into stylish charms. This not only saves money but also creates eco-friendly designs.
Pro tip: If you’re just starting out, grab a beginner’s DIY jewelry kit. It usually includes pliers, jump rings, clasps, and a small bead assortment—enough to make several charms.
Bag Charm Trends in Fashion (2025 Update)
Fashion trends shift quickly, and bag charms are no exception. Right now, bold and playful designs are taking the spotlight.
1. Oversized Resin Charms
Big, chunky resin letters and shapes are trending. These make a strong statement and stand out on neutral bags.
2. Beaded Charms with Symbols
Think smiley faces, fruit beads, or hearts. These give off a playful, Y2K vibe that’s all over Instagram and TikTok right now.
3. Minimalist Metallic Charms
Not everyone loves bold designs. Simple chains with one or two pendants—like a gold star or silver heart—are very chic. They pair well with professional handbags.
4. Eco-Friendly Materials
Sustainable fashion is hot. Many people are making charms out of recycled wood, fabric scraps, or even sea glass. These designs look natural and align with eco-conscious style.
5. Layered Charms
Instead of one charm, some fashion lovers clip on multiple smaller ones. The layered look creates depth and shows more personality.
If you’re looking for inspiration, scroll through fashion platforms like Vogue or Pinterest. You’ll see everything from luxury charms to handmade versions trending this year.
Gift Ideas: DIY Bag Charms for Friends & Family
Bag charms make excellent gifts because they’re thoughtful, personal, and budget-friendly. Plus, they’re practical—almost everyone uses a bag daily.
Here are some gifting ideas:
- For birthdays: Create charms with the person’s birthstone colors.
- For holidays: Make seasonal charms—snowflakes for Christmas, pumpkins for Halloween.
- For weddings or parties: Small tassel charms make fun bridesmaid gifts or party favors.
- For kids: Bright felt animals or cartoon-inspired charms for school backpacks.
- For travelers: Resin charms shaped like airplanes, globes, or luggage tags.
Presentation matters too. Place your handmade charm in a small organza pouch or jewelry box. A simple ribbon adds the finishing touch.
DIY bag charms as gifts show thoughtfulness. Instead of buying something generic, you’re giving a piece of your time and creativity.
Bag Charms for Different Bags
Not every charm fits every bag. The type of charm you choose should match the size, purpose, and vibe of the bag.
1. Handbags
Handbags look best with chic designs—think tassels, initials, or metallic charms. Keep them sleek to maintain elegance.
2. Tote Bags
Totes are big and casual, which means they can handle oversized or chunky charms. Resin letters, colorful beads, or layered tassels work perfectly here.
3. Backpacks
Backpacks are fun and playful. Add cartoon clay figures, mini plush charms, or bright beads. These designs match the casual vibe.
4. Luggage
For luggage, choose large, bright charms that make your bag stand out at baggage claim. Oversized tassels or colorful fabric charms are both stylish and practical.
5. Crossbody Bags
Crossbody bags are small, so go with a single charm. A simple resin letter or one tassel keeps the look balanced.
Matching the charm to the bag ensures your DIY design looks intentional, not random.
Final Takeaway – How to Make Bag Charms That Match Your Style
Making bag charms is one of the easiest and most rewarding DIY projects. All you need are a few supplies, a bit of creativity, and some time. Start with beads or tassels if you’re a beginner. As you gain confidence, experiment with fabric, resin, or clay.
Remember, the charm you make doesn’t just hang on your bag—it tells a story. It shows your creativity, your taste, and sometimes even your memories. Don’t worry about perfection. Handmade items look best when they carry a little character.
So grab your supplies, put on some music, and start crafting. Before you know it, you’ll have a charm that’s not just an accessory—it’s a piece of you.
How to Make Bag Charms (DIY Bag Charms Guide)

Spring Fashion trends 2025 : what's in!

Who Should Be Paying For Your Wedding Cards And Save The Dates?


Vacation Dresses for Women: Effortless Looks for Every Destination